Bed Leveling
Leveling the bed of a 3D printer is an essential step to ensure proper adhesion and accurate printing. Even with Auto Bed Leveling, it is the most essential and primary step in ensuring a good printer.
Here's a guide on how to level a 3D printer bed using the paper method:
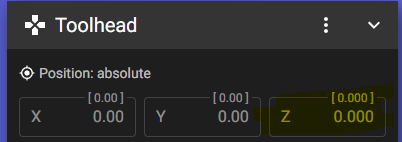
Home the Printer: Start by homing the printer, which will position the nozzle at its starting point.
-
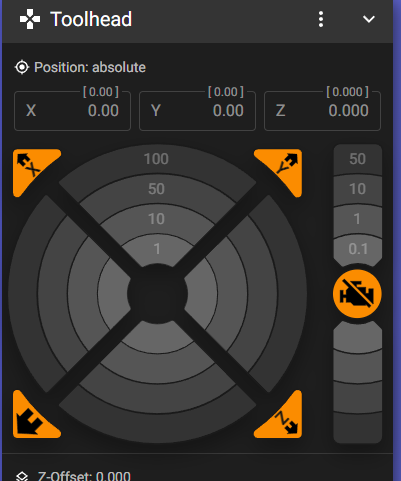
Disable Stepper Motors: Disable the stepper motors so that you can manually move the print head without resistance.
For Klipper, it's this button


Caution: Printers with BL Touch or Self-leveling
Preset the Z to 0.0 when doing this method before disabling the motors
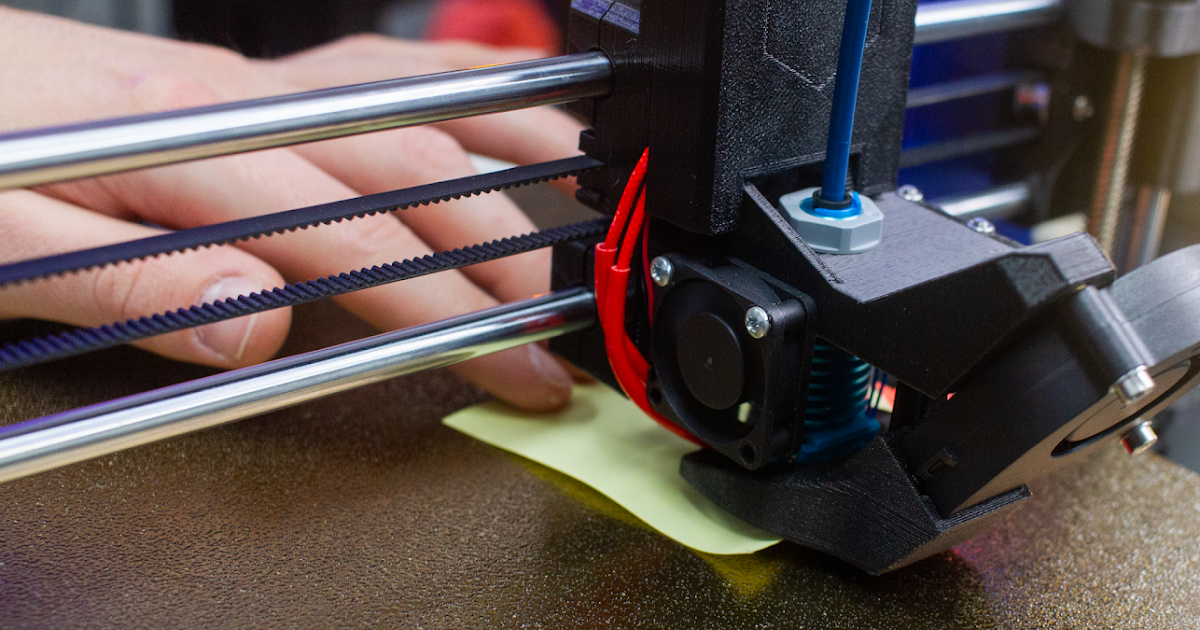
Move the Nozzle: Manually move the print head to each corner of the bed using the printer's control panel or software. Ensure that the nozzle is positioned directly above the corner. Place a Sheet of Paper: Take a sheet of standard printer paper or a thin gauge feeler gauge. Slide it under the nozzle while adjusting the bed height. The paper should have a slight resistance when moving under the nozzle.
- Adjust the Bed: Use the printer's bed leveling knobs or screws to adjust the bed height. Rotate the knobs or screws incrementally to raise or lower the bed until you achieve the desired resistance on the paper. Repeat for Each Corner: Repeat the process of placing the paper and adjusting the bed height for each corner of the bed. Ensure that the nozzle is at the same height above the bed in all corners.
Check the Center: After leveling the corners, check the center of the bed by sliding the paper under the nozzle at the center point. It should have a similar resistance as at the corners. If necessary, adjust the bed height in the center.
- Recheck and Fine-Tune: Repeat the leveling process a few times, going through each corner and the center, until the paper slides with a consistent resistance throughout.
Leveling the bed is an iterative process that may require adjustments over time as the printer settles or when switching print surfaces. Regularly check
No comments to display
No comments to display