Information Technology
How does computer work, even?
- How to set up a digital signboard
- How to use the label printer
- How to Print from Dymo LabelWriter 450
- BMS Music System
How to set up a digital signboard
The digital sign in the front window area of the makerspace is a 40" commercial display driven by a Raspberry Pi Model 3 B+. The "signboard" is set to display the contents of a Google Slides presentation on a loop, and it refreshes that presentation to pick up new slides once per hour. Here is a breakdown of how we set it up.
Google Slides
The Google Slides component is fairly straightforward:
- Create a Google Slides presentation, and save it somewhere on the Bellingham Makerspace shared Google Drive.
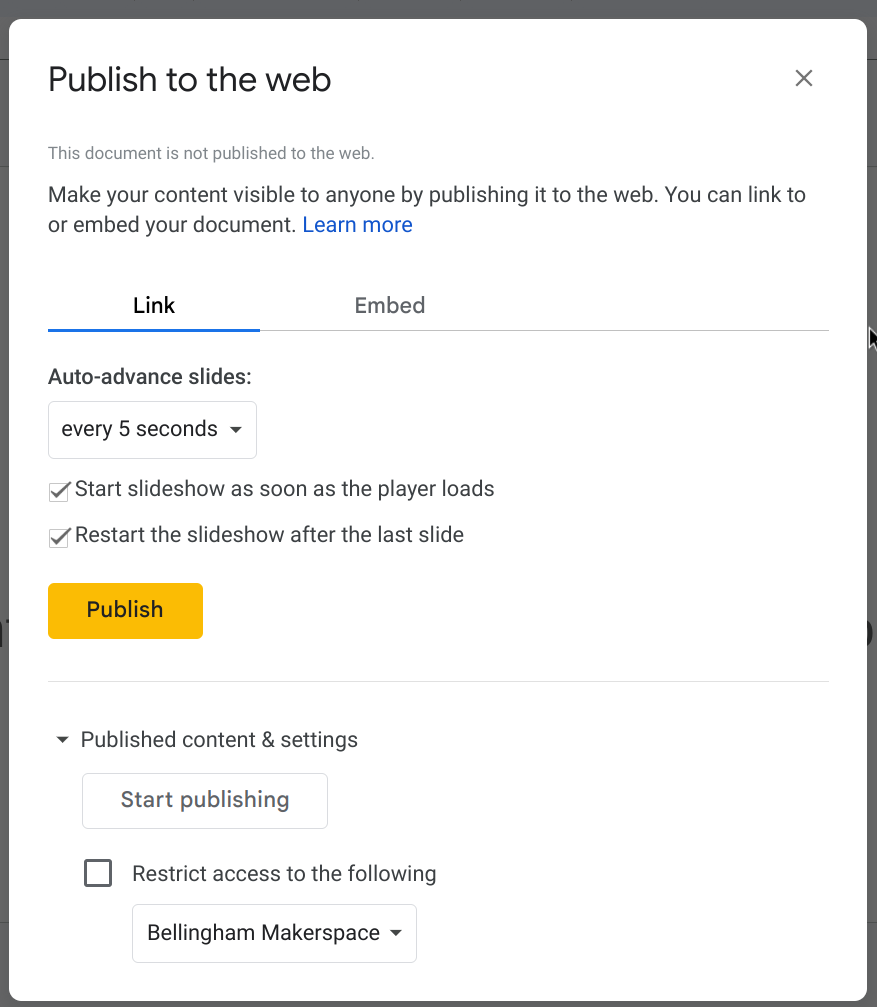
- Once your presentation is ready, click File > Share > Publish to Web

- Select the options you want for the slideshow, such as how quickly to auto-advance slides and whether to repeat, and then click the Publish button:

- You will be presented with a link to the published presentation. Save this for later.

Ubuntu/Raspberry Pi
The process for this is largely adapted from this tutorial from the Mir Server project.
- Set up the SD Card for the Raspberry Pi using the Raspberry Pi Imager.
- Install the Raspberry Pi Imager.
- Download the latest Ubuntu Server LTS release.
- Insert the Micro SD card into your computer.
- Launch the Raspberry Pi Imager application.
- Under "Choose Device", choose your Pi device.
- Under "Choose OS", scroll down to and click the "Use custom" option, and select the downloaded Ubuntu server image.
- Under "Choose Storage", select your micro SD card.
- When asked, "Would you like to apply OS customization settings?", select "Edit Settings".
- Under advanced configuration settings, enable SSH and change the hostname, default user, and configure WiFi. The standard procedure at Bellingham Makerspace is to use the default Linux user listed in Bitwarden, a boring and descriptive hostname (such as signkiosk01), and configure the system to use wifi unless it is near an Ethernet switch.
- Select "Save", "Yes", and "Yes".
- Place the SD card in the Raspberry Pi, connect it to a display, and then connect it to power. Watch the display during the boot process in order to get its IP address; you will need this to complete the setup.
- Once the system displays a login prompt, you can SSH into it using the user you created in step 1 and the IP address from step 2. Run
sudo apt dist-upgradeto ensure that all system packages are up to date. - Install and configure the ubuntu-frame snap package using the commands below. If this works, you will be presented with a simple black and white gradient on your display.
-
sudo snap install core
sudo snap install ubuntu-frame
sudo snap set ubuntu-frame daemon=true
-
- Install and configure the web kiosk snap:
-
sudo snap install wpe-webkit-mir-kiosk
sudo snap connect wpe-webkit-mir-kiosk:wayland
sudo snap set wpe-webkit-mir-kiosk daemon=true
-
- Set up the web kiosk snap to display the Google Slides presentation link from earlier. If this works, you will be presented with the looping slideshow
-
sudo snap set wpe-webkit-mir-kiosk url='https://docs.google.com/presentation/d/e/2PACX-1vR2xUkP32zgQSkUAnZjycR4Lyr6lQqVSxqZ2ZUxjj9CLJRj2HP0dTaX6V2FysWIGD2a360i6t_naD_V/pub?start=true&loop=true&delayms=5000'
sudo snap start wpe-webkit-mir-kiosk
-
- (optional) If you would like the signboard to automatically pick up changes to the slide deck, you will need to configure a cron job for the root user.
sudo crontab -e -u root

0 * * * * snap restart wpe-webkit-mir-kiosk >/dev/null 2>&1
That's it!
Troubleshooting
If Ubuntu Frame will not start on the Raspberry Pi, you may need to change the display driver.
If the kiosk reports the error "tls certificate has activation time in the future" you may need to set the time manually. This can be done the following way:
# Set date
sudo timedatectl set-time YYYY-MM-DD
# Set time
sudo timedatectl set-time HH:MM:SS
How to use the label printer
We have a Brother QL-710W thermal label printer on our network! It is attached to a Raspberry Pi, which provides a very nifty web interface for it.
To use this label printer:
- Make sure it is on. Look for a green status light; if there is no light, press the power button on the front.
- In any web browser, go to https://labelmaker.bellinghammakerspace.org
- Print your label!
How to Print from Dymo LabelWriter 450
- Open Dymo Connect application
- Click New, then click barcode template (Label type: Small Multipurpose Labels LW 1”x2 1/8”)
- Customize template where you want each element to go (maker name at top, barcode below, item name below with the price).
- Change barcode type to code 39
- Clear all placeholder text for all the elements.
- Click on import data, choose the catalog.xlsx recent file.
- Select what row you want to import.
- Now on the template when you click on an element there will be a purple box, click it and select what data you want to import in the selected area.
- Make any sizing adjustments and print
BMS Music System
Where to find
The control interface is located at music.bellinghammakerspace.org.
Make sure you're connected to the BMS network: bmswifi1. Access to the music panel is only available to those connected.
How to use
Logging In
When you first visit the site you will be presented with a login screen. Enter the shared BMS credentials to continue:
- Username: bms
- Password: makestuff

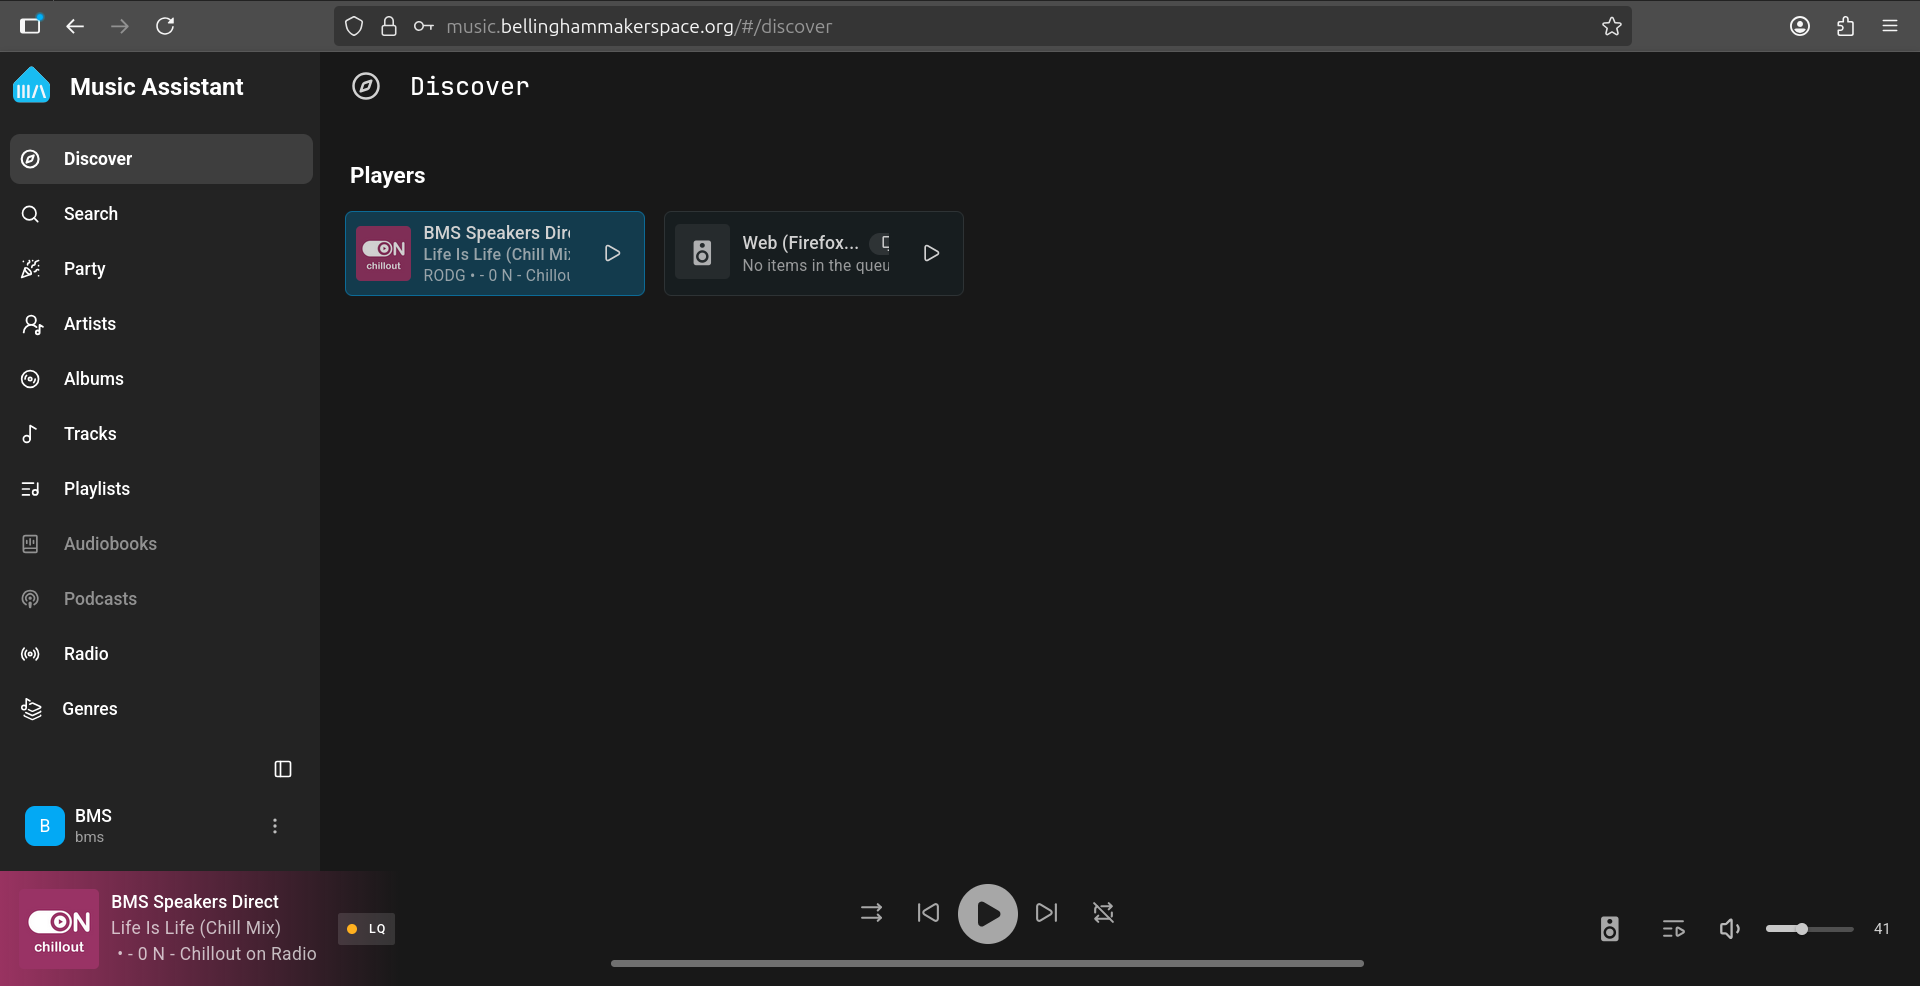
After signing in you will land on the Discover page, which shows the available players. The active player should be BMS Speakers Direct.
Station Selection
Go to Radio (located in the left sidebar):
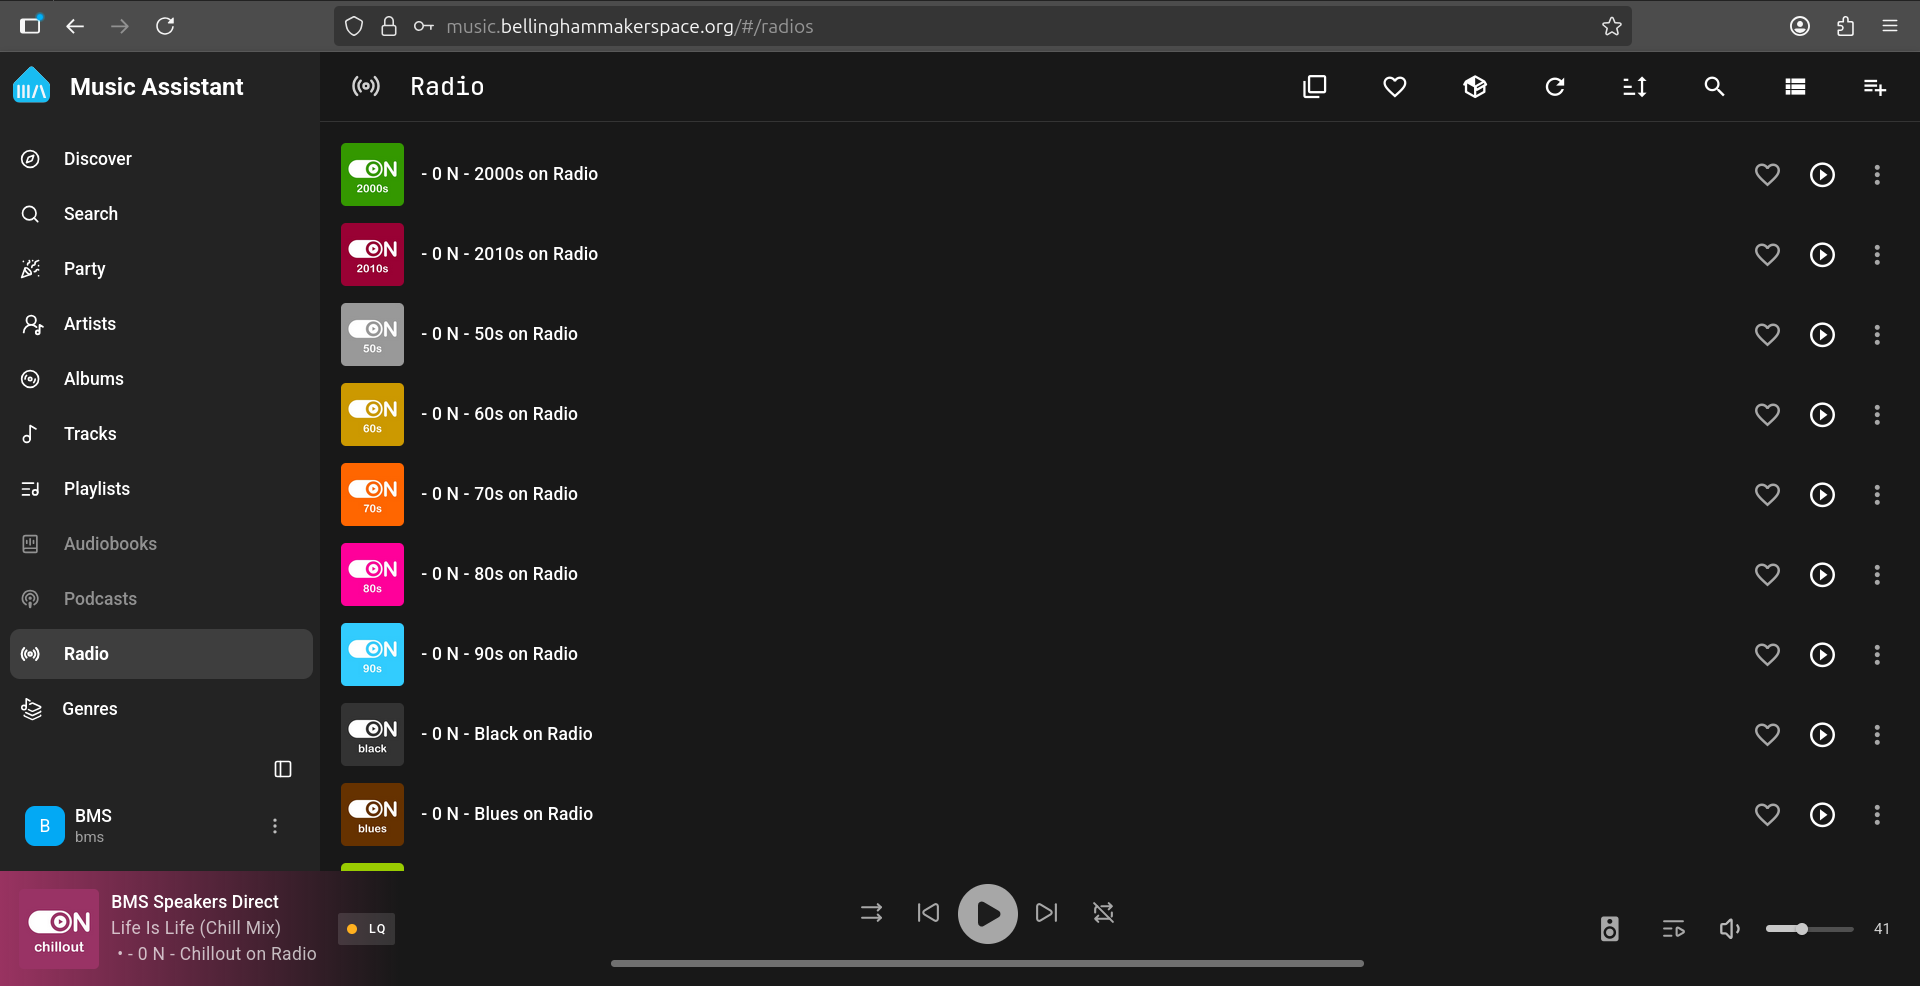
Find the station you want and click on it.
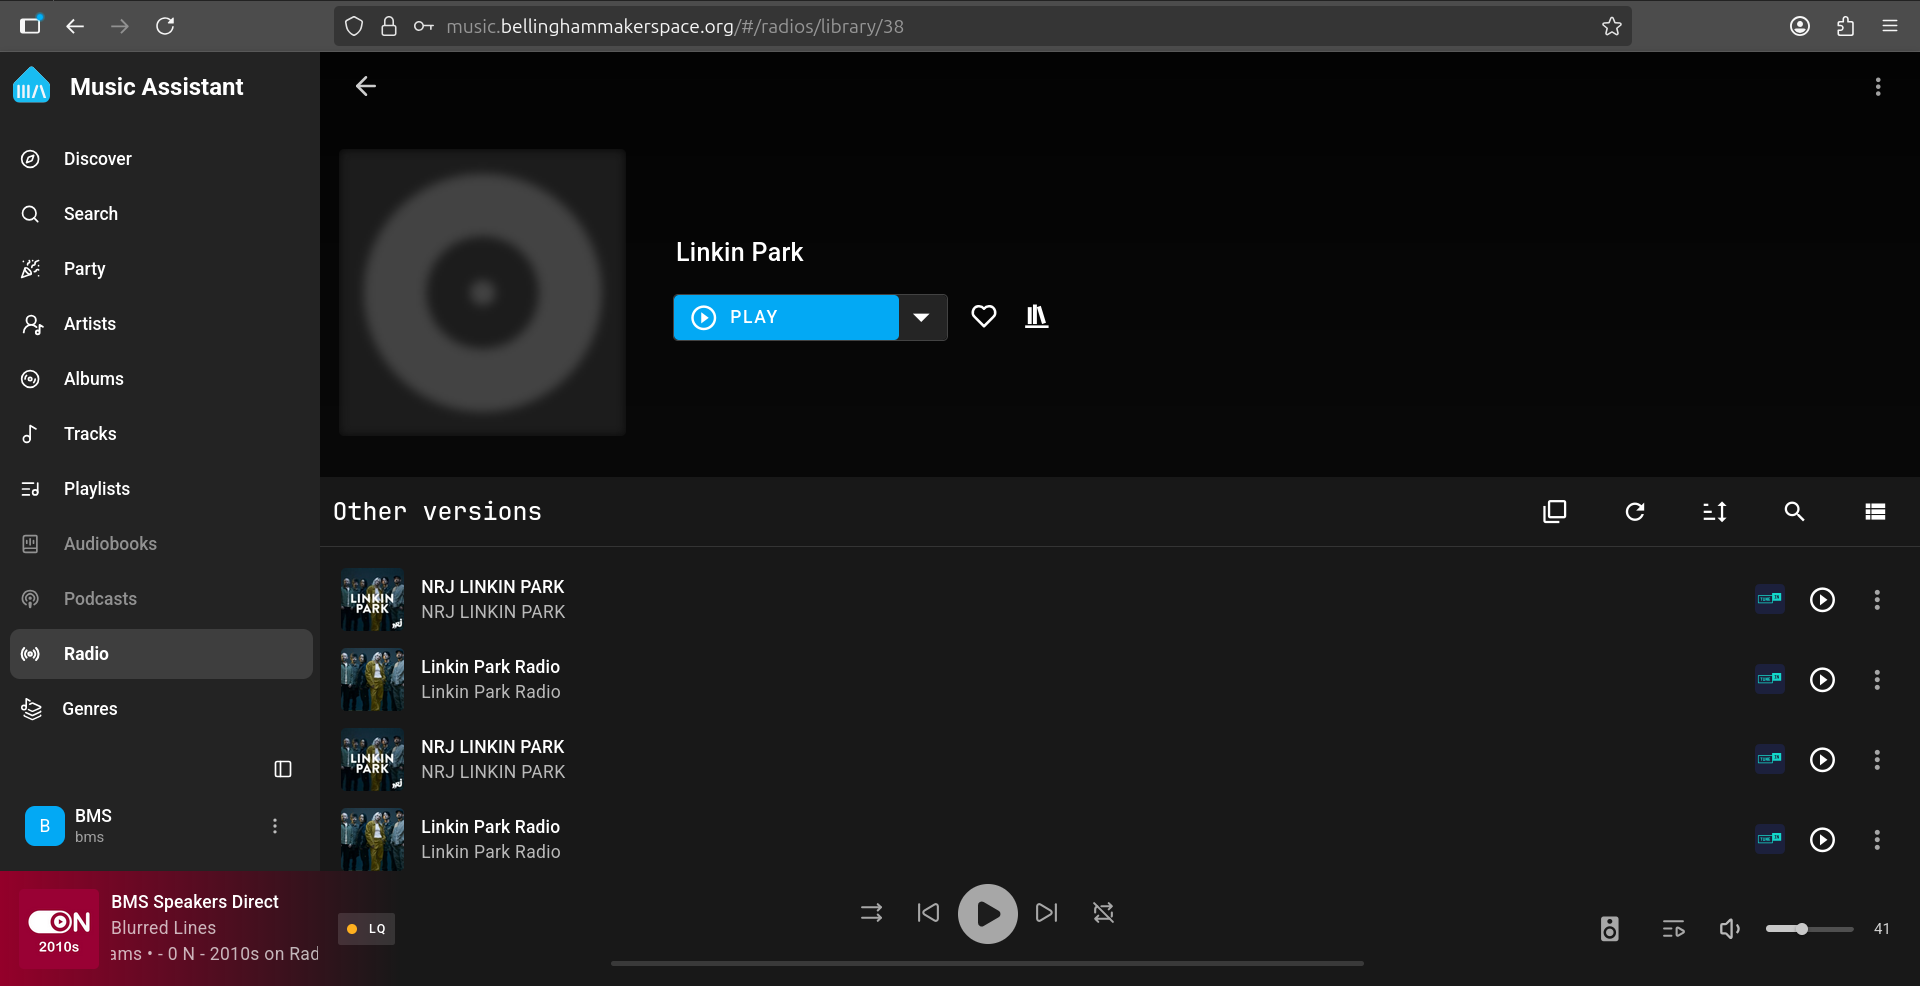
Click the dropdown arrow next to the blue "Play" button:
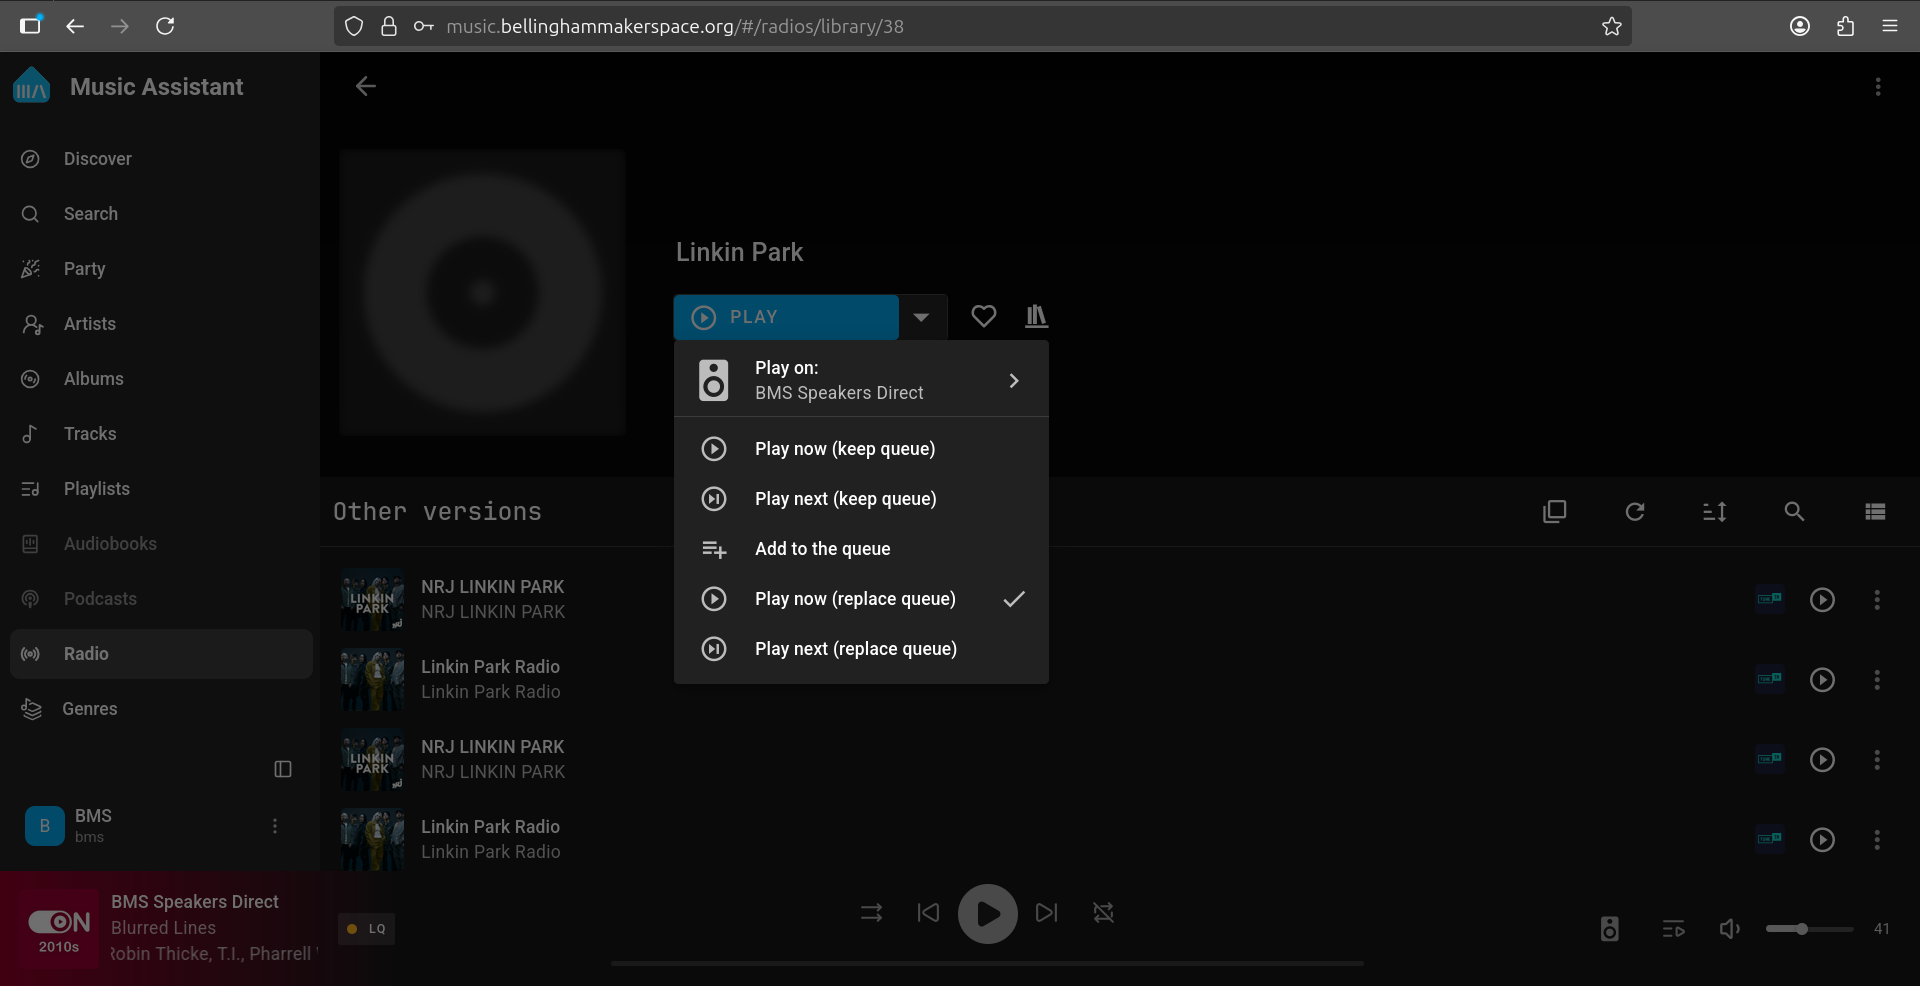
Select the correct speaker
(if not already selected)
Already selected
If you see "Play on: BMS Speakers Direct", click "Play now (keep queue)" or "Play now (replace queue)" to start playing:
Not selected
If the player shown is not "BMS Speakers Direct", click the "Play on:" row to expand the player list:
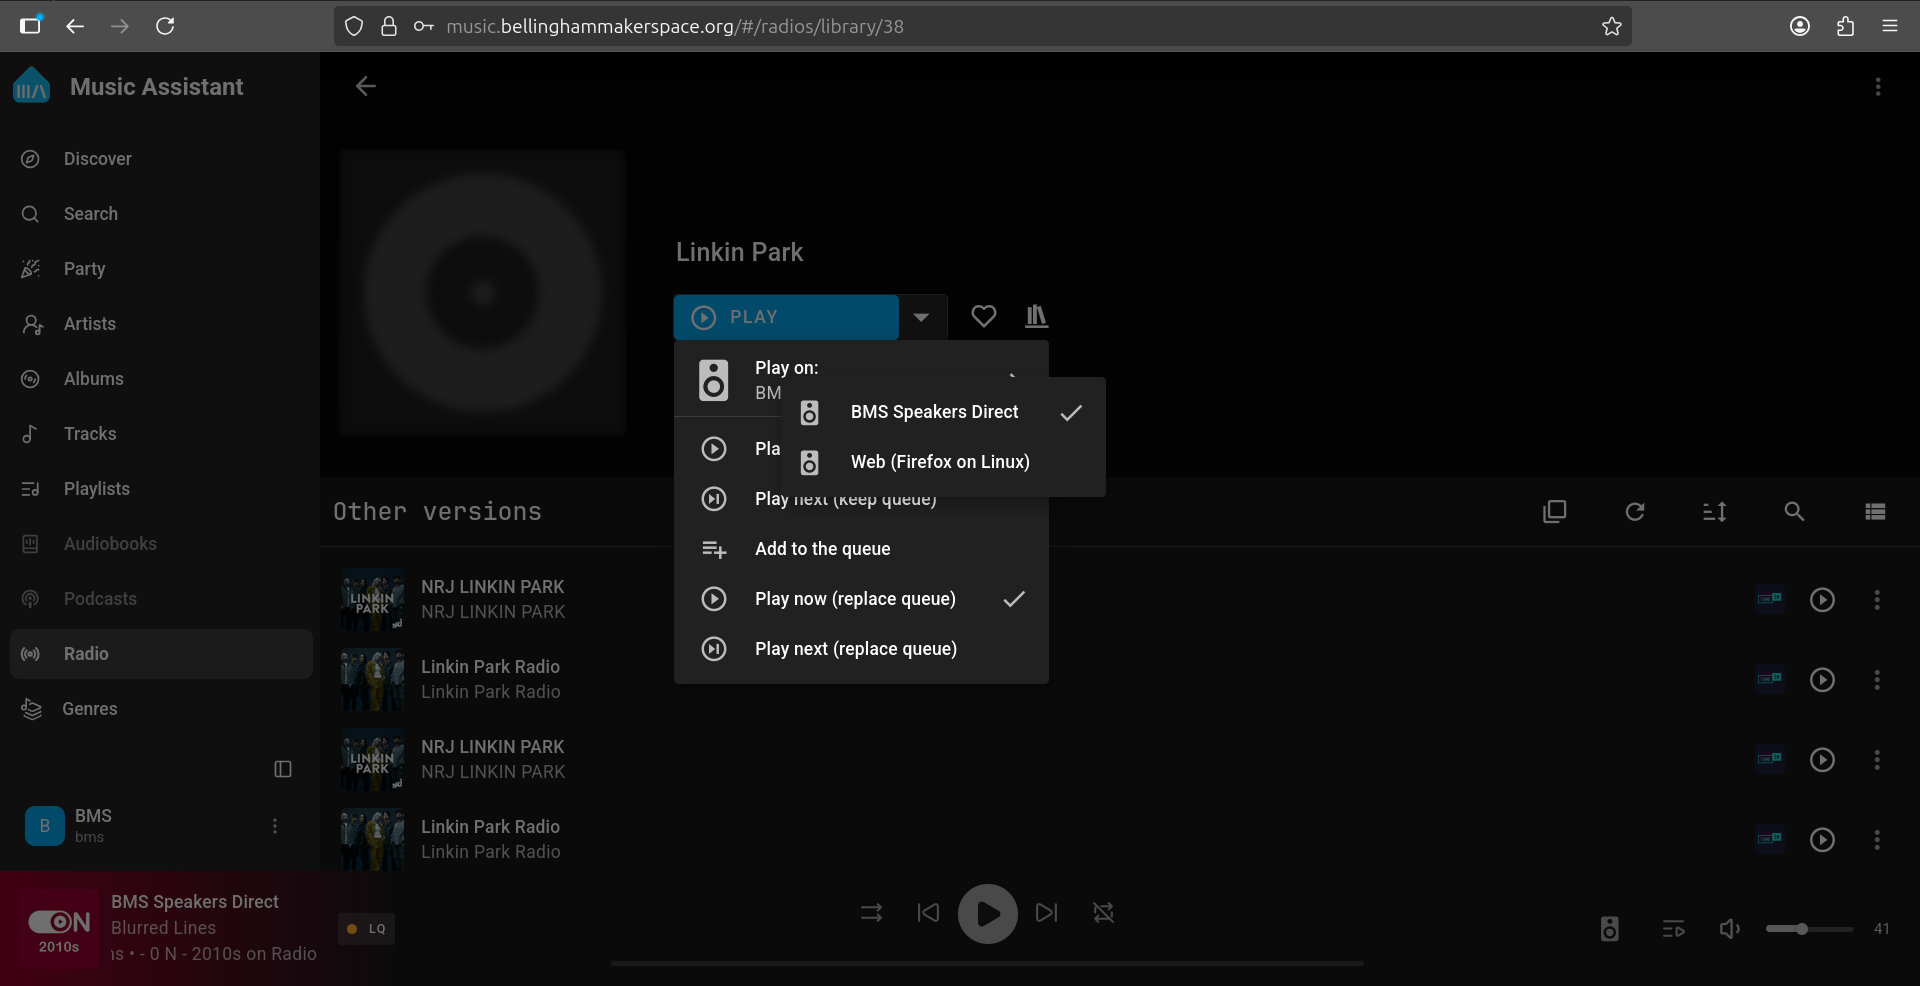
Select "BMS Speakers Direct":
Now click "Play now (replace queue)" or "Play now (keep queue)" to start the station.