# Soldering
Soldering tools, supplies, aids, and tutorials
# Soldering
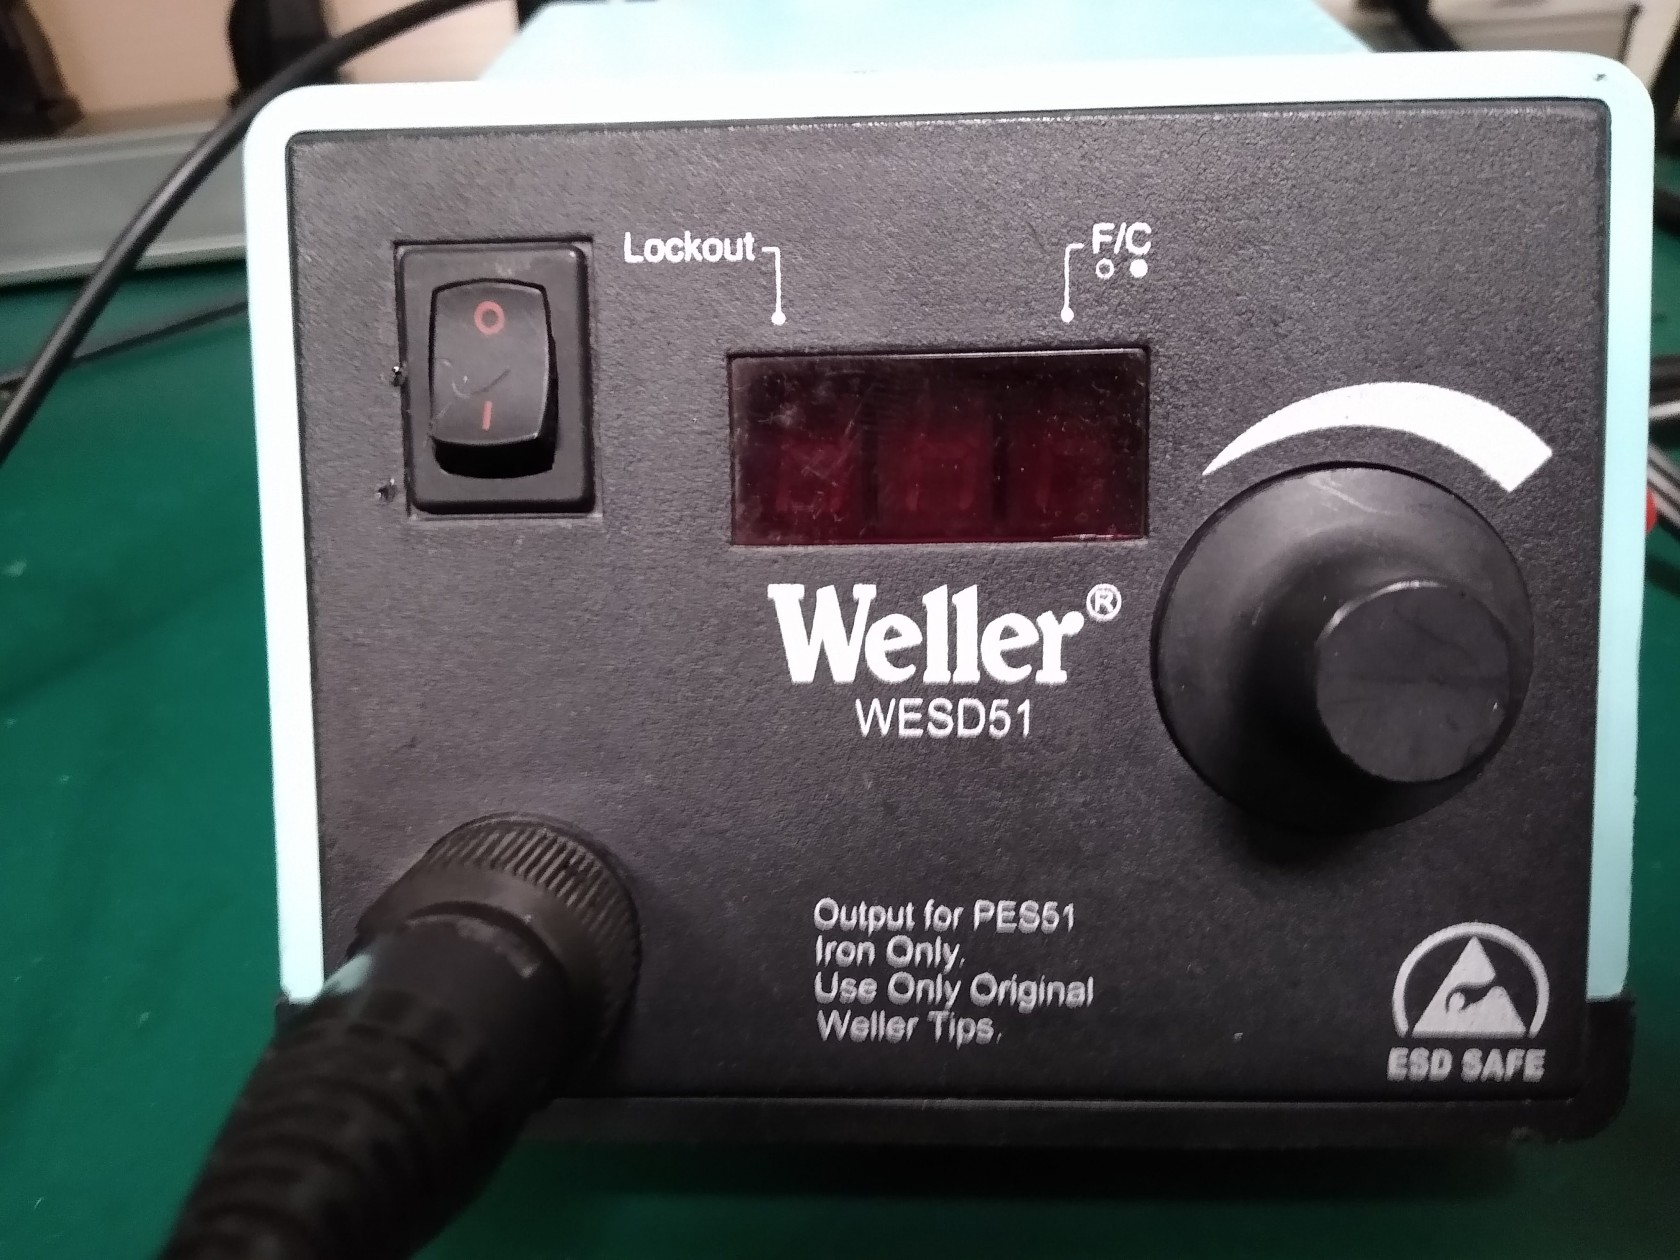
### **Soldering Irons**
Weller **WESD51**
- Temperature range: 350F to 850F
- Digital readout
- Grounded soldering iron tip
- Zero power switching
- Anti-static design
Before turning on, inspect and determine if the tip shape and size is suitable for your task. Change tip by unscrewing sleeve.
Adjust temperature with knob: Temperature displayed is sensed by the iron. For best results and to minimize thermal damage to your circuit parts, use only enough heat that does the job.
Station will automatically shut off power to the tool and the power indicator LED after 99 minutes of inactivity of the iron.
[](https://wiki.bellinghammakerspace.org/uploads/images/gallery/2024-05/img-20231121-114624488.jpg)
The Weller®PES51 tools are interchangeable without the need to make any adjustments to the station "Offset" function. This is made possible by the use of a precision temperature sensor; which is positioned deep inside the tip to insure rapid response to soldering load variations.
The Weller®PES51 tool has been specifically designed for use at electrostatic free workstations and is completely free from stored static charges.
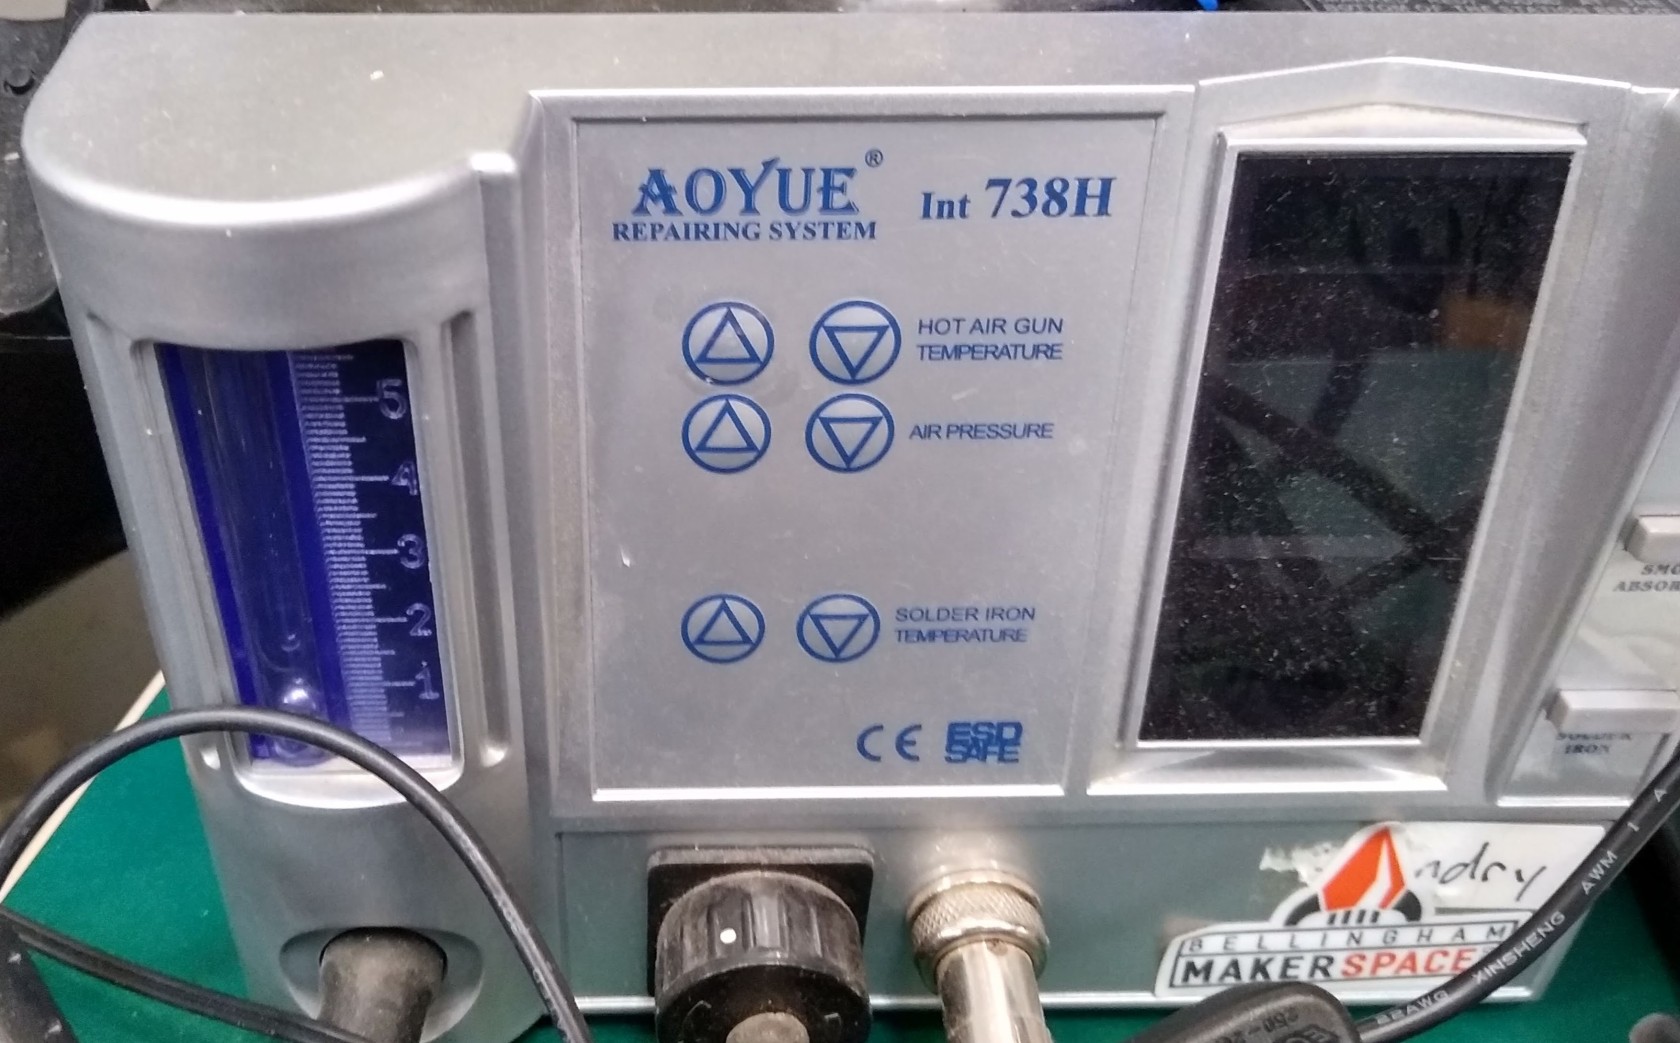
### **SMD / Hot Air Rework Stations**
#### **Aoyue 738H**
**Hot Air and Soldering Iron**
[Click here for 30 minute YouTube video -- Review and features](https://youtu.be/trNHHt2lx8A?si=Q6_fQ1AxWCUGG80X "YouTube - Aoyue738H")
Note: ON/OFF switch is located on back, to your top left.
[](https://wiki.bellinghammakerspace.org/uploads/images/gallery/2024-05/img-20230917-133427268-hdr.jpg)
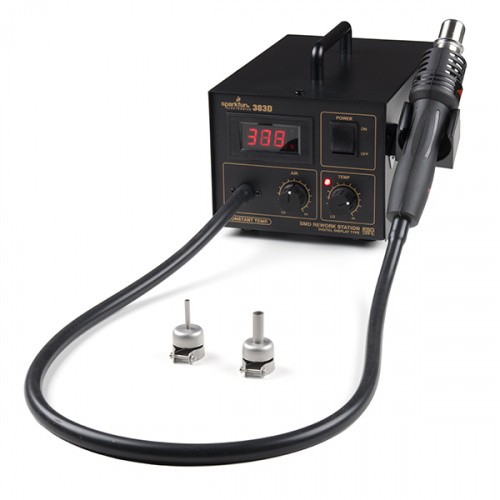
#### **SparkFun 303D**
[Click here for 303D Tutorial](https://learn.sparkfun.com/tutorials/how-to-use-a-hot-air-rework-station "303D Tutorial")
[Click here for YouTube video](https://youtu.be/9D0oTGeheBA?si=KUTHDwxzy4PHTKtl)
303D Hot-Air Rework Station has two knobs on the front of the case to control air flow as well as temperature. These knobs are labeled Low to High allowing you to adjust the 303D almost immediately.
[](https://wiki.bellinghammakerspace.org/uploads/images/gallery/2024-05/hot-air-rework-station-303d-04.jpg)
#### How to Use a Hot Air Rework Station
**Caution:** Do not use hot-air on surfaces you don't want ruined. Having a piece of scrap wood or something similar to work with hot-air on is highly recommended.
Third hands or other vice grips help tremendously. Remember, metal heat sinks and PCBs with ground planes can make reworking take a lot longer.
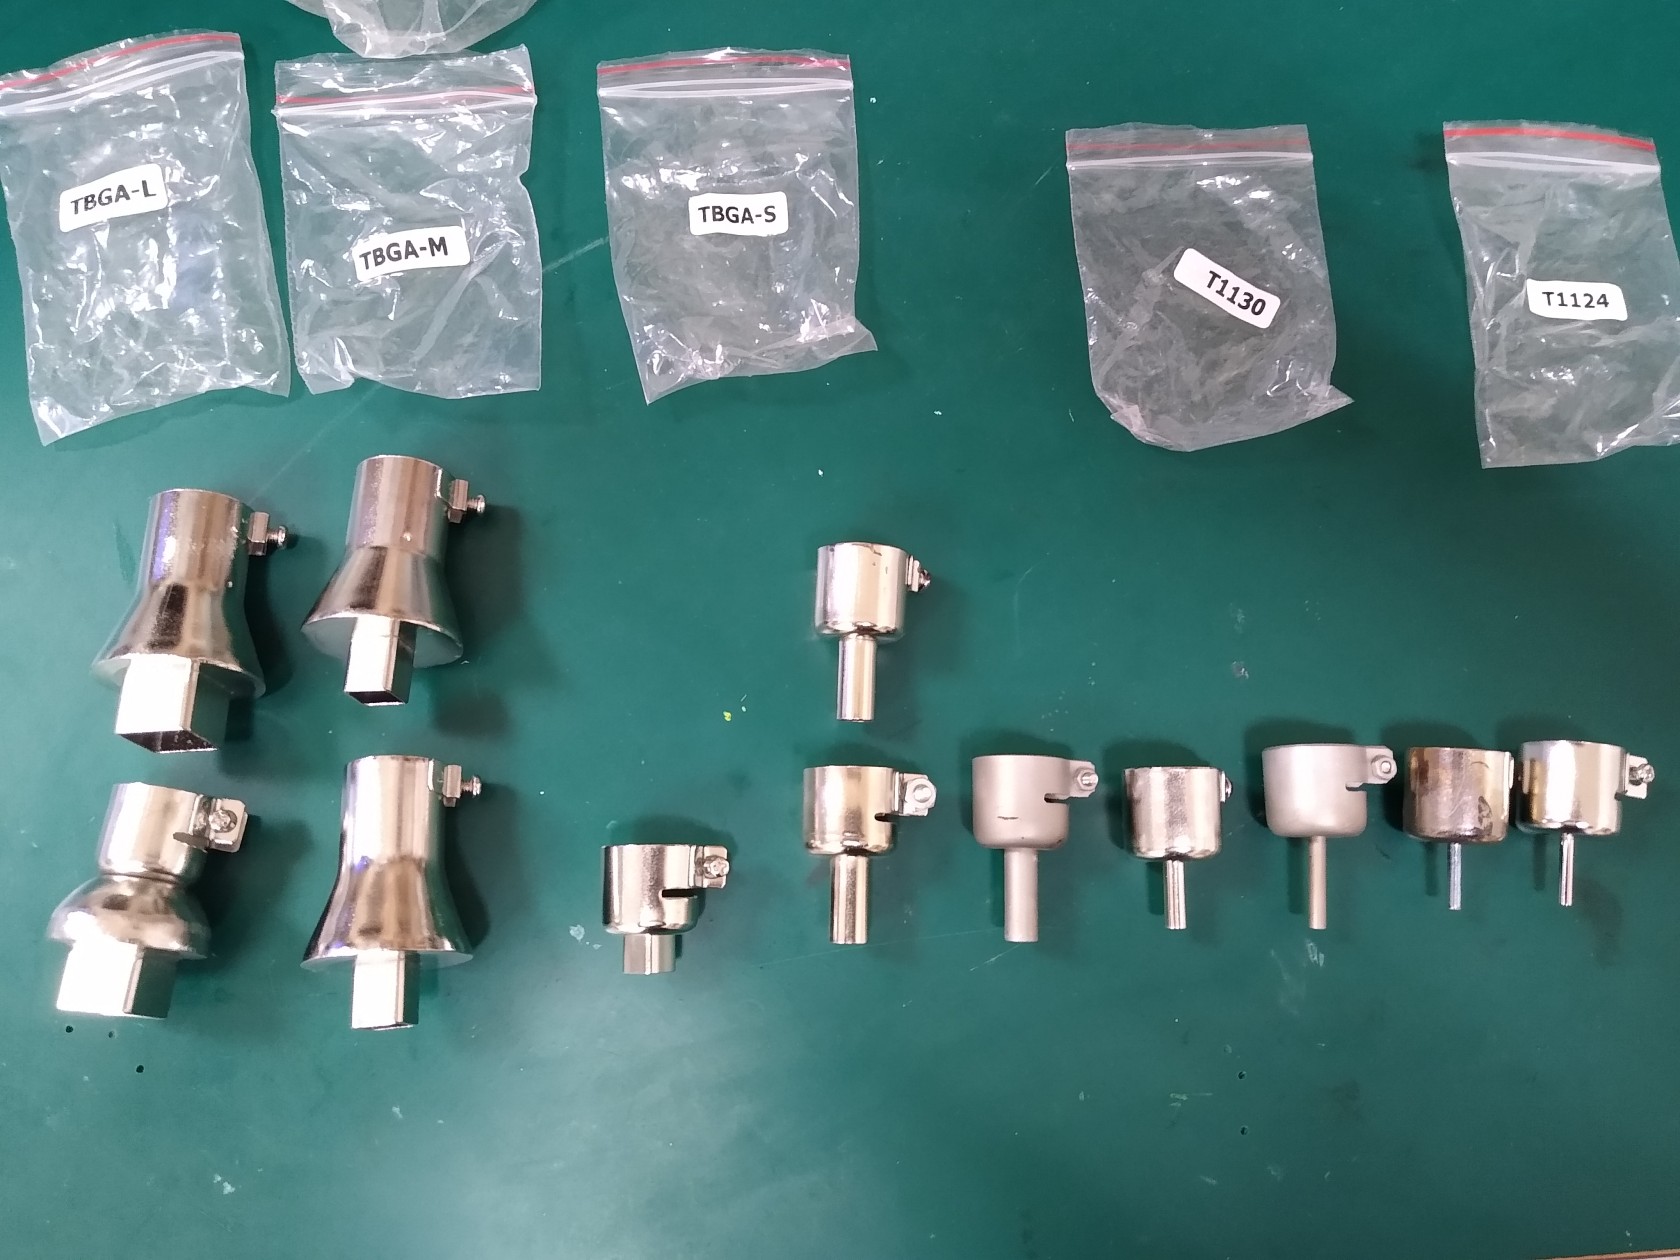
#### Choose Your Nozzle
Choose the appropriate tip for the job. Attach the nozzles to the wand and tighten the screw using a [screw driver](https://www.sparkfun.com/products/9146) to hold it in place.
[](https://wiki.bellinghammakerspace.org/uploads/images/gallery/2024-05/img-20240529-143434287.jpg)
**Caution:** Make sure to keep the hot-air gun moving to prevent any damage to the component or the PCB from burning. Aiming the heat gun at the same point can melt the board after a certain period of time. Certain components may be heat sensitive. Make sure to check the datasheet on the IC. The black plastic on male and female headers can melt while [surface mount buttons](https://www.sparkfun.com/products/8720) can become discolored. Be sure to aim the hot air at a component carefully!
If you also see smoke, warping, or black goo coming from your board, remove the heat and turn your heat setting down.
#### Adjust Air and Temperature
There are two control knobs – one for airflow and one for temperature. Adjust them to suit your needs.
**Note:** Set the temp and air-flow to the appropriate settings (slightly higher than the melting point of the solder, and not too much air to blow your parts away). We recommend setting the air flow and temperature knobs to the middle and then test reflow on a small component.
## **What's It Good For?**
Hot-air rework stations can be very handy. As mentioned above, they are a crucial tool when it comes to reworking a board. The term [rework](https://en.wikipedia.org/wiki/Rework_%28electronics%29) just means you are refinishing or repairing an already [reflowed](https://en.wikipedia.org/wiki/Reflow_soldering) board, and it is a term commonly used in the electronics world. Just think of it as doing any work to the board that wasn't involved in the actual production process. Here are some common rework scenarios:
- **Polarized Components** - Parts that have been placed incorrectly (backwards, shifted x degrees off). These include ICs, diodes, some capacitors, connectors, etc.
- **Tombstone Parts** - This is when a part (usually a resistor or capacitor) reflows only on one side. The part usually sticks straight up resembling a tombstone.
- **Cold Joints** - This is similar to a tombstone except the parts might not be sticking strait up, making it harder to see the connection that is not being made.
- **Removing Defective Parts** - Sometimes, during the IC manufacturing process, errors can arise and go unnoticed. These ICs are then placed on perfectly good PCBs. Hot-air is great for replacing these bad parts.
- **Missing Components** - The smaller the component, the easier it is for it to disappear. This can happen before or during reflow, resulting in a spot where something should be, but isn't. Hot-airing a new part in its place is a snap with this rework station.
- **Unintentional Solder Jumpers** - If too much solder or solder paste is used, the result can be jumpers on one or more of your surface mount IC's legs. Hot-air can sometimes be used in conjunction with a [flux pen](https://www.sparkfun.com/products/14579) to remove these pesky buggers.
#### Other Uses
Rework isn't the only thing a hot-air rework station is good for. Other uses include:
- Salvaging electronic components from old PCBs.
- Reflowing [solder paste applied with a stencil](https://cdn.sparkfun.com/datasheets/Kits/SFE03-0010-SimonSMDStenciling-Kitcard-ReaderSpreads.pdf) between SMD components and a PCB.
- Shrinking [heat-shrink](https://www.sparkfun.com/products/9353) to secure wire connections.
- Heating up and bending certain plastics (with the correct settings).
- Heating up hot glue to remove or reposition items that were glued incorrectly.
# Soldering Guide
Some soldering tutorials:
**[Intro To Soldering](https://sites.google.com/stanford.edu/soldering-internal/learning "Stanford Soldering Intro")**
Video: **[A Comprehensive Guide to Soldering: Techniques, Tools, and Tips](https://www.instructables.com/A-Comprehensive-Guide-to-Soldering-Techniques-Tool/ "Soldering Guide")**
**WARNING:** Many of the solders contain LEAD. Even if you choose a lead free solder, others have not. Consider all work surfaces and tools to be contaminated with lead. Wash hands after using the area.