3D Printing
Wiki for using Bellingham Makerspace 3D printers
- Introduction to 3D Printing at the Makerspace
- Getting Started with Klipper Firmware and Mainsail
- 3D Printers
- Testing out
- 3D Printer Maintenance Guide
- Rules for 3D Printing
Introduction to 3D Printing at the Makerspace
Before operating any 3D printers at the Bellingham Makerspace, it's important to adhere to the following guidelines:
-
Training Requirement:
- All users must be trained in the use and operation of the 3D printers.
- Training can be obtained by taking an Introduction to 3D Printing class or by testing out of the class with a staff member or area lead.
-
Available Printers:
- The Bellingham Makerspace provides access to three Bambulabs P1P printers, an Ender CR-10, and a CR-30.
-
Payment for Prints:
-
Safety and Responsibility:
- Operate the printers responsibly and adhere to all safety protocols outlined during training.
- Do not operate printers without proper training on the equipment.
By following these guidelines, we can ensure a safe and efficient 3D printing environment at the Bellingham Makerspace. If you have any questions or require assistance, please don't hesitate to reach out to staff or area leads.
Getting Started with Klipper Firmware and Mainsail
To access Klipper for the Ender 3 machines
Bed Leveling
Leveling the bed of a 3D printer is an essential step to ensure proper adhesion and accurate printing. Even with Auto Bed Leveling, it is the most essential and primary step in ensuring a good printer.
Here's a guide on how to level a 3D printer bed using the paper method:
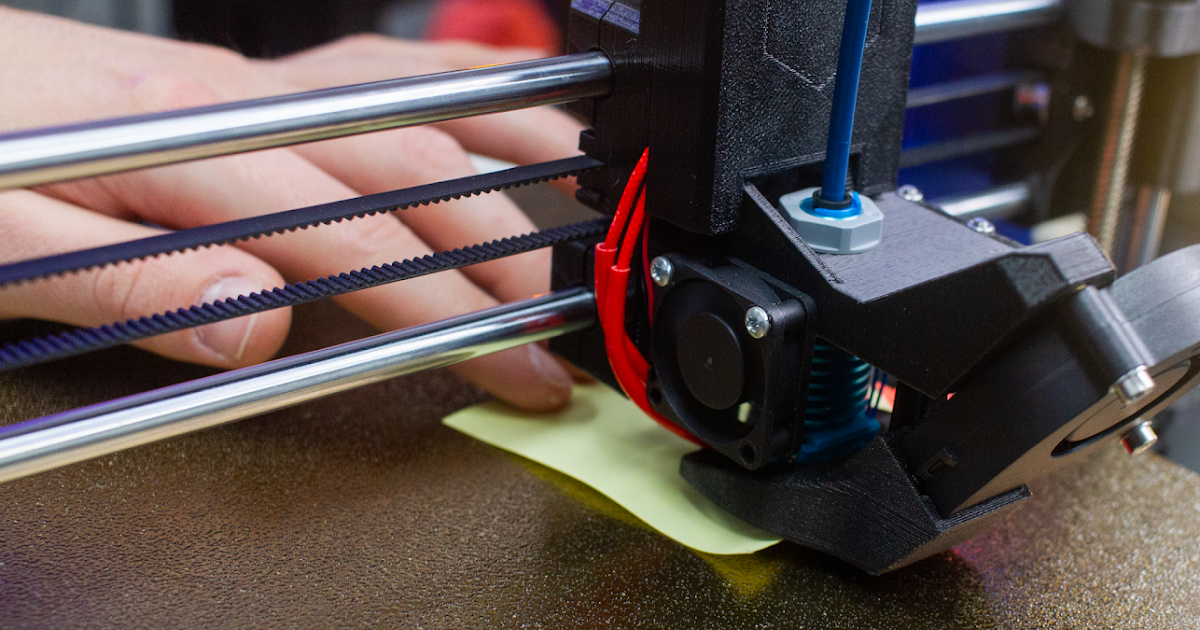
Home the Printer: Start by homing the printer, which will position the nozzle at its starting point.
-
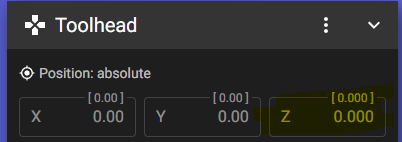
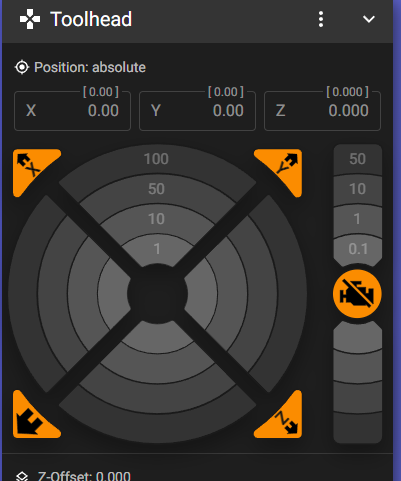
Disable Stepper Motors: Disable the stepper motors so that you can manually move the print head without resistance.
For Klipper, it's this button


Caution: Printers with BL Touch or Self-leveling
Preset the Z to 0.0 when doing this method before disabling the motors
Move the Nozzle: Manually move the print head to each corner of the bed using the printer's control panel or software. Ensure that the nozzle is positioned directly above the corner. Place a Sheet of Paper: Take a sheet of standard printer paper or a thin gauge feeler gauge. Slide it under the nozzle while adjusting the bed height. The paper should have a slight resistance when moving under the nozzle.
- Adjust the Bed: Use the printer's bed leveling knobs or screws to adjust the bed height. Rotate the knobs or screws incrementally to raise or lower the bed until you achieve the desired resistance on the paper. Repeat for Each Corner: Repeat the process of placing the paper and adjusting the bed height for each corner of the bed. Ensure that the nozzle is at the same height above the bed in all corners.
Check the Center: After leveling the corners, check the center of the bed by sliding the paper under the nozzle at the center point. It should have a similar resistance as at the corners. If necessary, adjust the bed height in the center.
- Recheck and Fine-Tune: Repeat the leveling process a few times, going through each corner and the center, until the paper slides with a consistent resistance throughout.
Leveling the bed is an iterative process that may require adjustments over time as the printer settles or when switching print surfaces. Regularly check
3D Printers
Printers and Capabilities
CR-10
The Ender CR-10 has a 500mm³ print volume. It's an FDM Printer capable of printing PLA, PETG, and Flexible Filament* (depending on print settings). It cannot print ASA, ABS, PolyCarbonate, or Nylon. It is perfect for printing larger items that cannot fit on an Ender 3.
Before printing with the printer, see the staff for more assistance. This printer requires more preparation time and attention to detail to ensure good-quality print.
Recommended Print Setting at as follows (Cura and PrusaSlicer)
| Setting | Range |
| Speed | 25-50m/s (Max) |
| Extrude Temp Range | 200-250c° |
| Bed Temp Range | 0-55c° |
CR-30
The CR-30 has a 200mm x 180mm x infinite print volume. It’s an FDM Printer of prints of PLA, PETG, and Flexible Filament* (depending on print settings). It cannot print ASA, ABS, PolyCarbonate, or Nylon. It is perfect for printing long continuous items that cannot fit in the print volume of a traditional printer.
Like the CR-10, Please see the staff before operating this machine.
The CR-30 needs to be leveled before it operates otherwise the print will fail.
|
This machine is sliced using ideaMaker not Cura or PrusaSlicer |

Bambulabs P1P
Bambu P1P 3D Printer User Guide
-
Important Reminders:
- Do not exceed 100% printing speed: To limit excessive wear on the machines, ensure that the printing speed is kept below 100%.
- Do not disassemble the machines: Please refrain from taking apart the 3D printers or any other equipment. If you encounter issues, seek assistance from staff or area leads.
- Seek help if it's broken: If you encounter any problems or notice any malfunctioning equipment, please ask for help rather than attempting to fix it yourself. Our staff and area leads are here to assist you.
Load Filament:
- Locate the filament loading mechanism on the printer.
- Ensure the printer's nozzle is heated to the appropriate temperature for the filament material you intend to use. Refer to the filament manufacturer's recommendations.
- Insert the end of the filament spool into the filament loading mechanism.
- Follow the printer's instructions to feed the filament into the extruder assembly until it reaches the hotend.
-
Find and Prepare Design:
- Explore online repositories such as Thingiverse, MyMiniFactory, or Cults3D to find printable designs.
- Download the desired 3D design file (typically in STL format) to your computer.
- If needed, utilize 3D modeling software like Blender or Tinkercad to modify or prepare the design to suit your requirements.
-
Set Print Preferences:
- Open BambuStudios
- Import the downloaded STL file into the slicer.
- Navigate to the "Slice" or "Prepare" button to generate the G-code file.
-
Print Design:
- Transfer the sliced G-code file to the designated computer connected to the 3D printer.
- Navigate to the printer's interface or dedicated printing software.
- Click on "Slice Plate" to load the G-code file onto the printer.
- Select an available printer from the list.
- Click on "Print Plate" to initiate the printing process.
-
Collect Print:
- Once printing is complete, carefully remove the printed object from the build plate.
- If the print requires further post-processing, such as removing supports or sanding, perform these tasks as necessary.
- Inspect the printed object for quality and completeness.
-
Return to Bed:
- After removing the print, ensure the print bed is clear of any debris or filament remnants.
- If the print bed is heated, allow it to cool down before starting a new print.
- Carefully place the print bed back into the printer, ensuring it is correctly oriented and aligned.
Testing out
How to test out of 3D Printing Class.
Testing out
Test-Out Option for 3D Printing at Bellingham Makerspace
At Bellingham Makerspace, we offer a test-out option for individuals who are already proficient in 3D printing and wish to bypass the Introduction to 3D Printing class. Here's how the test-out process works:
Demonstration of Proficiency:
- Schedule a session with a staff member or area lead to demonstrate your proficiency in 3D printing.
- During this session, you will be asked to perform various tasks related to 3D printing, such as:
- Loading filament into the printer.
- Preparing and slicing a 3D model using slicing software.
- Initiating and monitoring a print job.
- Performing basic troubleshooting, if necessary.
Assessment:
- The staff member or area lead will assess your performance and determine whether you have the necessary skills and knowledge to safely operate the 3D printers.
- Your understanding of 3D printing concepts, safety procedures, and printer operation will be evaluated.
Important Considerations:
- The test-out option is only available to individuals who already possess a strong understanding of 3D printing principles and have experience operating 3D printers.
- It is essential to ensure that you are fully prepared and confident in your abilities before attempting the test-out option.
- If you do not pass the proficiency assessment, you may still enroll in the Introduction to 3D Printing class to receive formal training.
- To schedule a test-out session or for more information, please contact a staff member or area lead at Bellingham Makerspace.
3D Printer Maintenance Guide
How to maintain 3D printers
Bambu Lab P1 Series Printer Maintenance Guide
MAINTENANCE IS DONE BY STAFF AND AREA LEADS ONLY |
Maintenance Frequency
X-axis Carbon Rods:
- Frequency: Every 2 weeks
- Procedure: Clean with isopropyl alcohol and a lint-free cloth.
Z-axis Lead Screws:
- Frequency: Monthly
- Procedure: Clean and re-grease to ensure smooth operation.
Y and Z-axis Linear Rods:
- Frequency: Bi-monthly; every three months for anti-rust treatment
- Procedure: Clean and lubricate to prevent rust and ensure smooth movement.
Extruder Assembly:
- Frequency: After every significant printing project or visible accumulation
- Procedure: Clean with compressed air to remove debris.
Filament Cutter:
- Frequency: Check every 2 rolls; more frequently for abrasive materials
- Procedure: Replace the blade if it becomes dull.
Hotend Silicone Sock:
- Frequency: Check monthly or if issues are noticed
- Procedure: Replace as needed to maintain temperature consistency.
Idler Pulley:
- Frequency: Monthly or when any irregularities in movement are noticed
- Procedure: Lubricate to eliminate noise and ensure smooth operations.
Chamber Camera:
- Frequency: Monthly or after printing with materials like ABS
- Procedure: Ensure clarity by cleaning the lens regularly.
Part Cooling Fans:
- Frequency: Every 2 weeks
- Procedure: Clear any accumulated dust with compressed air.
Nozzle Wiper:
- Frequency: Check and clean after each printing session
- Procedure: Replace if damaged or ineffective.
PTFE Tube:
- Frequency: After 3 rolls of abrasive or 7 rolls of regular filament
- Procedure: Inspect and replace if worn to maintain filament feed quality.
This adjusted schedule accounts for increased wear and tear, helping maintain the printer's performance and longevity in a high-use environment. For step-by-step instructions and further details, please refer to the Bambu Lab P1 Maintenance Guide.
Rules for 3D Printing
Our makerspace is dedicated to fostering creativity and innovation in a safe and supportive environment. To ensure that all members and visitors can enjoy and benefit from our facilities, we adhere to the following our rules
3D Printing Regulations and Rules
This Wiki entry outlines the key rules and guidelines for using the facilities at Bellingham Makerspace. Adhering to these rules ensures a safe, productive, and welcoming environment for all members and visitors.
Rules and Regulations
-
-
Training Requirement
- Objective: Ensure competence in safely operating equipment.
- Rule: No use of complex machinery, like 3D printers, without prior training and authorization from makerspace staff.
-
Weapons Prohibition
- Objective: Maintain a safe environment.
- Rule: The possession or use of weapons is strictly forbidden on makerspace premises.
-
Recycling and Waste Disposal
- Objective: Promote environmental sustainability and cleanliness.
- Rule: Dispose of all waste materials and scraps in designated recycling bins with proper segregation.
-
Cleanliness
- Objective: Maintain an organized workspace ready for use.
- Rule: Clean workspace and return all tools and materials to their designated places after completing projects.
-
Equipment Care
- Objective: Prevent equipment damage and ensure maintenance.
- Rule: Do not attempt to repair or modify any equipment. Report issues immediately to staff, leading to an incident report.
-
Payment for Prints
- Objective: Simplify and ensure transparency in transactions for 3D printing services.
- Rule: Pay for prints either at the counter immediately upon collection or online via PayPal link as provided in the payment procedures.
-
Prohibited Items, See Weapons Policy and Enforcement
Enforcement
Enforcement
At Bellingham Makerspace, our "No Weapons" policy extends to all aspects, including the manufacturing of firearms or related components. We strictly adhere to regulations outlined in RCW 9.41.190 of the Washington State Legislature, which prohibits the manufacture of certain firearms, bump-fire stocks, undetectable firearms, short-barreled shotguns, and short-barreled rifles, along with any parts intended for such use.
Our staff diligently monitor the premises to ensure compliance with these rules. If any member or visitor is found engaging in the manufacture of prohibited items, immediate action will be taken. This may include expulsion from our makerspace and, if necessary, reporting to the appropriate local authorities or federal agencies in accordance with the law.
We take these measures seriously to maintain a safe and secure environment for all members and visitors at Bellingham Makerspace.
Prohibited Printing Filaments
For the Bambu P1P 3D printer without an enclosure, we've created a list of materials that are not recommended due to the printer's open design and the need for proper ventilation and temperature control:
-
ABS (Acrylonitrile Butadiene Styrene): ABS is known for emitting potentially harmful fumes and requiring high temperatures for proper printing. These conditions are difficult to maintain without an enclosure, which can result in warping and poor air quality.
-
ASA (Acrylonitrile Styrene Acrylate): Similar to ABS, ASA also emits fumes during printing and requires high temperatures that are best managed in an enclosed environment.
-
PC (Polycarbonate): PC needs very high printing temperatures and is susceptible to moisture absorption, which can negatively impact print quality. Enclosures help maintain the necessary temperature and protect the material from environmental factors.
-
Nylon: This material is tough and flexible but also requires high temperatures for printing. It absorbs moisture from the air, which can degrade its quality and performance without proper storage and printing conditions.
-
HIPS (High Impact Polystyrene): Commonly used as a support material with ABS, HIPS requires similar printing conditions, including a heated environment to minimize warping, which is typically achieved with an enclosure.
Each of these materials presents specific challenges when used without an enclosure, such as the need for stable high temperatures and controlled ventilation to manage fumes and ensure print quality. When selecting filaments for the Bambu P1P, it's crucial to consider these factors to maintain safety and achieve optimal results (3DSourced) (Printing It 3D) (Manufacturing on Demand) (Wevolver).
Approved Printing Filaments
Approved 3D Printing Materials for Bambu P1P Without Enclosure
The following list includes materials that are recommended for use with the Bambu P1P 3D printer when not using an enclosure. These materials are chosen for their ease of printing, low emission during printing, and the lack of a need for controlled environment conditions.
PLA (Polylactic Acid)
- Printing Temperature: 180°C - 220°C
- Properties:
- PLA is one of the most popular 3D printing materials due to its ease of use and environmental friendliness. Derived from renewable resources like corn starch, it's biodegradable under industrial composting conditions and prints with minimal odor, making it ideal for educational and household use.
- Known for its good detail and low warping, PLA does not require a heated print bed, simplifying its use in open environments.
PETG (Polyethylene Terephthalate Glycol)
- Printing Temperature: 220°C - 250°C
- Properties:
- PETG offers a balance between the ease of PLA and the strength of ABS. It features good flexibility, strong layer adhesion, and resistance to chemical and moisture. PETG is more durable than PLA and does not emit harmful gases during printing, making it suitable for use without an enclosure.
- Its slight flexibility and high durability make it appropriate for functional parts that require a degree of sturdiness not provided by PLA.
PLA+ (Enhanced PLA)
- Printing Temperature: 190°C - 220°C
- Properties:
- PLA+ is an enhanced version of standard PLA, designed to be tougher and more durable. It retains all the printing ease of regular PLA but with increased strength and slightly higher resistance to heat.
- Suitable for projects that demand a bit more from the material without the need for stringent printing conditions.
TPE (Thermoplastic Elastomers)
- Printing Temperature: 210°C - 230°C
- Properties:
- TPE is a category of flexible 3D printing materials known for their elasticity and flexibility. These materials are easy to print and provide exciting options for items that require bending and stretching capabilities.
- Ideal for producing objects like gaskets, hoses, and wearable items, TPE can be printed without an enclosure, though care should be taken to ensure the material feeds smoothly into the printer due to its flexibility.
These materials are suitable for printing on the Bambu P1P without an enclosure due to their lower operational temperatures and minimal hazardous emissions.
Payment for 3D Printing Services at Bellingham Makerspace
Overview
This page outlines the payment procedures for 3D printing services at Bellingham Makerspace. Understanding these procedures ensures that members can efficiently manage transactions, contributing to the sustainable operation and improvement of our community's resources.
Why We Charge for 3D Printing
- Operational Costs: 3D printing involves maintenance and upkeep of machines, software updates, and material costs. Charging helps cover these expenses.
- Responsible Usage: Implementing a fee encourages members to optimize resource use, reducing waste and promoting careful planning of print jobs.
- Sustainability: Revenue from printing services is reinvested into the makerspace, allowing for upgrades, new equipment purchases, and cost reductions over time.
- Community Growth: Fees support community workshops and educational programs, fostering learning and collaboration within the makerspace.
- Fair Access: Charging for services helps regulate demand, ensuring all members have equal access to 3D printing capabilities.
Payment Methods
At the Counter:
- Review Your Bill: Staff will provide a detailed cost breakdown for your print job, including materials used and any other applicable fees.
- Payment Options:
- Acceptable methods include cash, credit/debit cards, and electronic payments like Apple Pay or Google Wallet.
- Receipt: You will receive a receipt upon payment, important for your records.
Via PayPal Link:
PayPal
- Payment Link: After your 3D print order is placed, you will receive a PayPal link via email or on your user dashboard.
- Completing the Transaction:
- You can pay using your PayPal account or credit/debit card through PayPal's guest checkout.
- Include "3D Printing" in the notes
- Confirmation: After payment, you will receive confirmation emails from both PayPal and Bellingham Makerspace.
Example Cost Calculation for 25 Grams
|
This example illustrates a typical cost for a small print job, helping members estimate their expenses.
Conclusion
Bellingham Makerspace offers flexible payment options to accommodate all members. By contributing to the cost of printing, you help sustain and grow the resources available to our community.
Cleaning Procedure
Quick Cleaning Procedure for 3D Printing Area
Total Time: 8 Minutes
1. Preparation (1 Minute)
- Gather Cleaning Supplies: Collect all necessary cleaning tools and materials, such as isopropyl alcohol, microfiber cloths, plastic scrapers, a small broom, dustpan, and waste bins.
2. Clear the Build Area (2 Minutes)
- Remove Debris: Carefully remove any loose filament strands, failed prints, and raft materials from the build plate and surrounding area.
- Dispose of Waste: Immediately place all debris into the designated recycling bin or trash depending on the material type.
3. Clean the Build Plate (2 Minutes)
- Wipe Down: Spray a small amount of isopropyl alcohol on the build plate and gently wipe with a microfiber cloth to remove any adhesive residue or leftover filament.
- Check for Stickiness: Ensure the surface is not sticky; if residue persists, use a plastic scraper gently to remove any stubborn spots.
4. Sweep the Area (1 Minute)
- Sweep Up: Use a small broom to sweep the floor and areas around the printer, focusing on gathering any dust, filament fragments, and other small debris.
- Collect with Dustpan: Pick up the swept debris with a dustpan and dispose of it properly.
5. Inspect and Wipe Printer Exterior (1 Minute)
- Quick Inspection: Visually inspect the printer for any spilled materials or dust.
- Clean Exterior: Wipe down the exterior surfaces of the printer with a dry microfiber cloth to remove dust and potential spills.
6. Organize Supplies (1 Minute)
- Return Supplies: Put back all cleaning materials and tools to their designated storage spots.
- Ready for Next Use: Ensure that the printer is set up for the next user, with the build plate correctly aligned and the filament guide clear.
By incorporating sweeping into the cleaning routine, you ensure that the area not only stays free of large debris but also maintains a level of cleanliness that prevents dust and small particles from affecting printer operation and product quality.